
The Pool Excavation Process
If you’ve ever imagined stepping into your own backyard oasis on a hot summer day, you’re not alone. Thousands of New Jersey homeowners kick off their pool projects every year. One of the first questions they ask is: what does the pool digging process actually look like? Understanding the pool excavation process from start to finish helps you set realistic expectations, communicate better with your contractor, and avoid costly surprises along the way.
This guide walks you through building a pool step by step, with a focus on the excavation phase that sets the foundation for everything that follows.
Why the Pool Excavation Process Matters More Than You Think
Most homeowners fixate on finishes — the tile, the lighting, the water features. But none of that matters if the ground beneath your pool isn’t properly prepared. The pool excavation process is the most physically demanding and logistically complex phase of any inground pool installation. Get it wrong, and you’re looking at structural issues, drainage problems, and expensive repairs down the road.
Excavation isn’t just digging a hole. It involves precise surveying, soil analysis, equipment coordination, and careful removal of thousands of cubic yards of earth. When done correctly, it creates a stable, level foundation that supports decades of use. When rushed or handled by an inexperienced crew, it can compromise the entire structure.
Step 1: Site Assessment and Design Finalization
Before a single shovel hits the ground, your contractor will conduct a thorough site assessment. This includes evaluating soil composition, checking for underground utilities, reviewing local zoning laws and permit requirements, and assessing drainage patterns on your property.
In New Jersey, homeowners also need to account for the clay-heavy soil common in many parts of the state. Clay retains water, which creates hydrostatic pressure against pool walls. This is a factor that needs to be addressed during both excavation and pool construction. Your contractor should pull the required permits from your municipality before any work begins. Skipping this step can result in stop-work orders, fines, and mandatory demolition of completed work.
Once permits are approved and the design is locked in, the team will mark the pool’s footprint on your lawn using spray paint or stakes, mapping out the exact dimensions and depth variations for shallow and deep ends.
Step 2: Mobilizing Equipment for the Pool Digging Process
The pool digging process begins with bringing in the right heavy equipment. Depending on the size of your pool and yard accessibility, your contractor may use a combination of excavators, backhoes, skid steers, and dump trucks to remove displaced soil.
Tight backyard access is one of the most common challenges in residential pool excavation. If your yard has a narrow gate or limited clearance, contractors may need to use compact excavators or even hand-dig certain sections. This adds time and labor cost, which is why site accessibility is always discussed during the quoting phase.
Expect the actual pool digging process to take anywhere from one to three days for a standard inground pool. Larger or more complex designs such as freeform pools, pools with attached spas, or projects on sloped terrain can extend that timeline considerably.
Step 3: Excavation and Soil Removal
Once the equipment is in place, excavation begins from the perimeter inward. The crew will work methodically, following the staked outline and carefully transitioning between depth zones. The shallow end is typically excavated to around 3.5 to 4 feet, while the deep end can go anywhere from 6 to 8 feet depending on your design.
During the pool excavation process, the removed soil is loaded into dump trucks and hauled off-site. This is an often-overlooked cost. Soil disposal fees can add up, especially for larger pools, so keep that in mind. Some homeowners opt to use the displaced dirt elsewhere on their property for grading or landscaping purposes, which can offset some of that expense.
Once the primary excavation is complete, the crew performs final hand-shaping to refine the walls and floor of the hole. This precision work ensures that the pool shell will sit correctly and that there are no uneven spots that could cause cracking or settling later.
Step 4: Dealing With Rock, Groundwater, and Unexpected Obstacles
No blog about the pool digging process would be complete without addressing the unexpected. Even with thorough site preparation, crews sometimes encounter solid rock formations, tree roots, or high groundwater levels mid-excavation.
Rock removal requires jackhammering or even controlled blasting, which significantly increases cost and timeline. Groundwater intrusion may require the installation of a dewatering system to keep the excavation dry enough to work in. These situations aren’t rare; they’re a normal part of pool construction in many parts of New Jersey, particularly in areas with rocky substrates or high water tables.
This is exactly why working with an experienced, licensed contractor matters. A seasoned crew will have contingency plans for these scenarios and won’t be caught off guard when the earth doesn’t cooperate.
Step 5: Structural Preparation — Building a Pool Step by Step From the Ground Up
With the hole dug and shaped, the project transitions from excavation to construction. Building a pool step by step from this point involves several interconnected phases:
Plumbing rough-in: Before any concrete or shell material goes in, the plumbing lines are laid out along the floor and walls of the excavation. This includes return lines, suction lines, main drains, and any features like jets or water features.
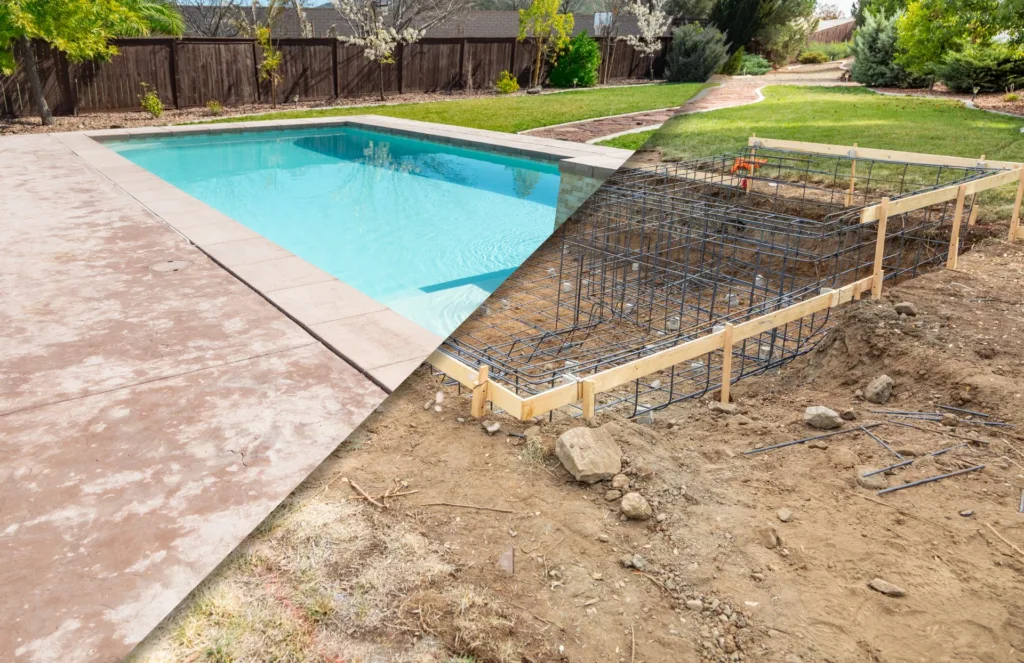
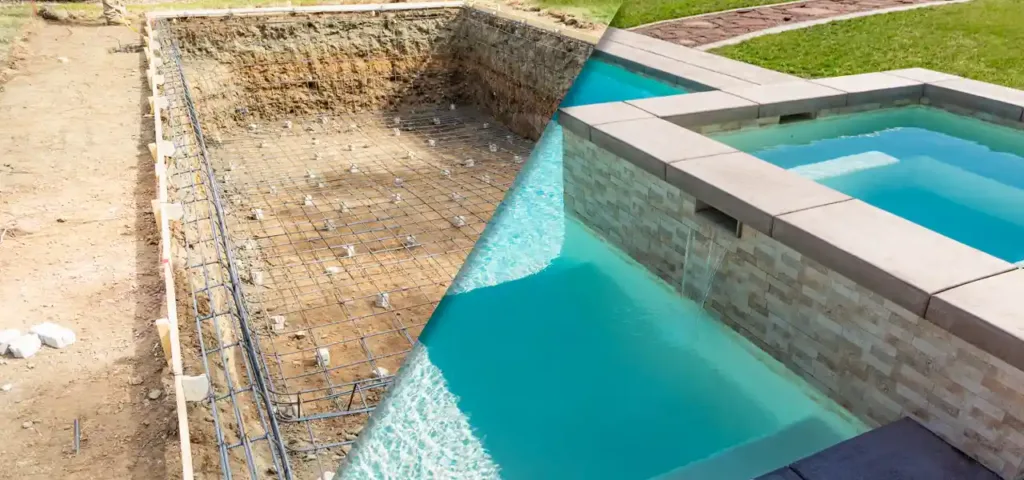
Steel reinforcement (for gunite or shotcrete pools): A grid of rebar is tied together and positioned throughout the pool cavity. This steel skeleton gives the pool its structural integrity and determines its final shape.
Gunite or shotcrete application: A high-pressure hose sprays a dry or wet concrete mix over the rebar framework, creating the pool shell. This layer is typically 6 to 10 inches thick and must cure for several days before work continues.
Tile and coping installation: Once the shell has cured, tile is applied along the waterline and coping stones are installed around the pool’s edge. These elements are both decorative and functional, creating a finished border between the pool and the surrounding deck.
Interior finish: The final surface, whether marcite, quartz aggregate, or glass tile, is applied to the interior of the shell. This is the surface that gives your pool its color and texture.
Step 6: Decking, Landscaping, and Final Inspections
Building a pool step by step concludes with the surrounding environment. Concrete, pavers, or natural stone are installed around the pool perimeter. Landscaping is restored, fencing is installed (required in New Jersey for all residential pools), and equipment, such as pumps, filters, heaters, automation systems, are connected and tested.
A final inspection by your local municipality confirms that everything meets code before water is introduced. Once that sign-off is received, your pool is filled, balanced, and ready for use.
Final Pool Excavation Thoughts
Understanding the pool excavation process and the full scope of building a pool step by step transforms you from a passive bystander into an informed homeowner. The pool digging process alone involves weeks of planning, precision equipment operation, and expert crew coordination before the first drop of water ever enters the picture. When you appreciate that complexity, you understand why quality installations take time and why cutting corners during excavation is never worth the risk.
Choose a contractor who communicates clearly, pulls proper permits, and has a proven track record in your area. Your pool is a long-term investment and it all starts with the right hole in the ground.
Start digging your pool with Custom Pool Pros!